Acarno defeats Zeno - for now - and is reunited once again with Hosaka and Chris before learning that Zeno intends to launch missiles, explaining they will reach their targets within 30 minutes.
[Episode 7] Defeating Tempest
Summary
Acarno defeats Zeno – for now – and is reunited once again with Hosaka and Chris before learning that Zeno intends to launch missiles, explaining they will reach their targets within 30 minutes.
Hosaka’s plan; get the ship high enough before blowing it up in order to save the Earth, and Hull Drive in East Edge City.
We also learn Hosaka’s true identity – he is the real Ryuichi Hayano and reveals his father was in charge of what is now “Project Meridian”, placing him in a key role at the age of 12. This was after his father discovered the Earth’s atmosphere would only last a short time and believed the only way for humans to survive was for a select few to escape the planet.
Enter scientist; Masato Hosaka. She believed there was another way and converted Hosaka’s (or Ryuichi’s) beliefs. As a result, the real Ryuichi was disowned by his dad. There “other” Ryuichi (who is now dead) is revealed to have been a clone, created by his father.
This gives Hosaka the ability to control the ship’s main computer system, as it was designed to only be controlled by either Zeno or Ryuichi. Hosaka reveals further details for his plan to blow up the ship, not by using the self-destruct mechanism – which Zeno has already permanently disabled – but by taking out the ship with the help of Navarro Jean.
As Navarro, you must navigate Shangri-la’s “Anti-Matter Room” in order to reunite with Acarno, Hosaka and Chris.
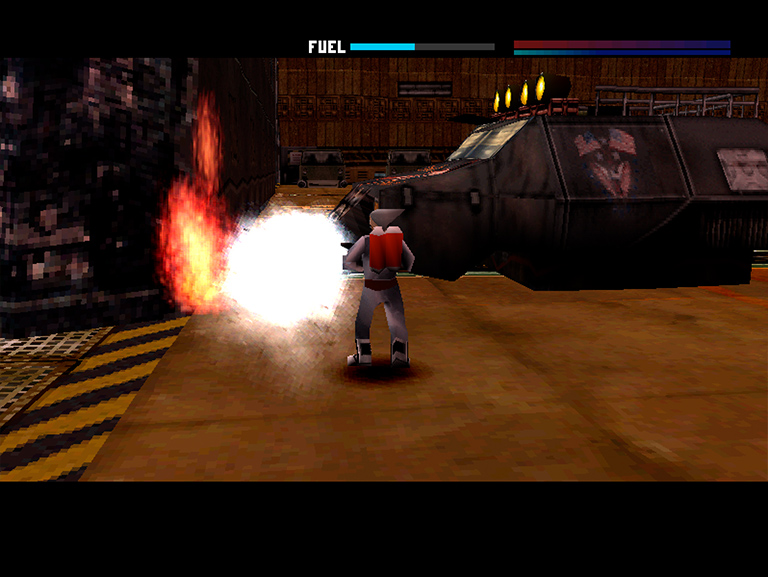
Following the cut scene you will regain control of Navarro all the way back at Shangri-la’s Docking Bay. Before going any further, equip the HEAT PROOF SUIT and either the COOL SOLE BOOTS or MOONLIGHT BOOTS. Next equip the FIRE EXTINGUISHER and prepare to put out a couple of fires;
Fires; There are 3 fires to extinguish. All of them are just in front of the hole in the shutter door in front of the flymobile.
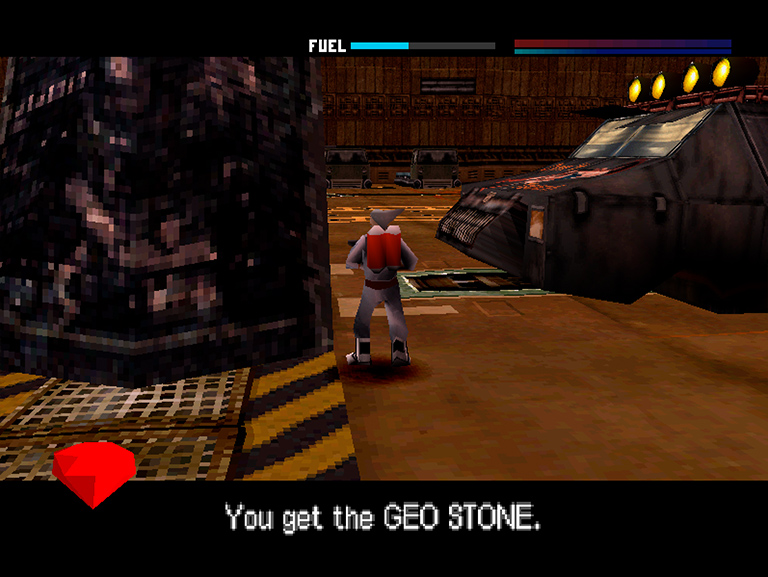
Items; Each of the fires has a GEO STONE that can be picked up once extinguished.
Door; After collecting the items, put away the FIRE EXTINGUISHER and equip a firearm before heading through the silver double doors.
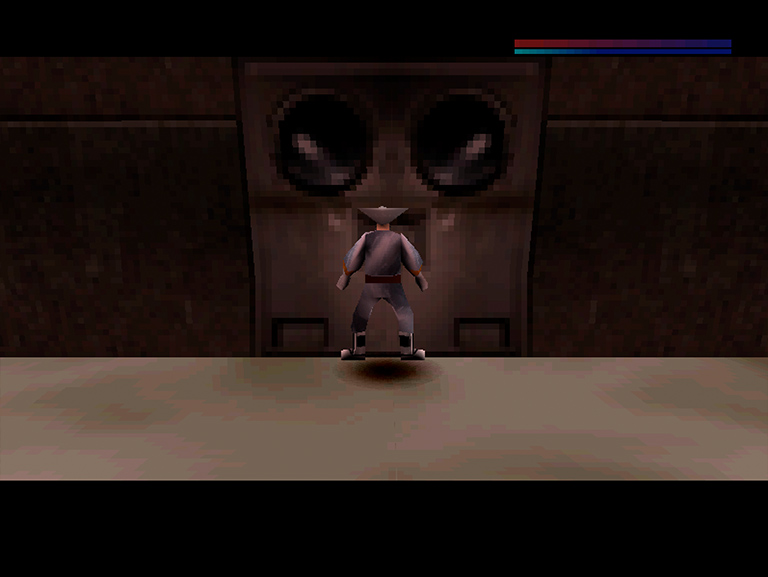
Guards; Take out both guards. Neither leaves behind any items, so put away your weapon and head through the doorway at the end of the corridor.
Elevator; Head into Shangri-la's central elevator and choose to go to the "Engine Room Level".
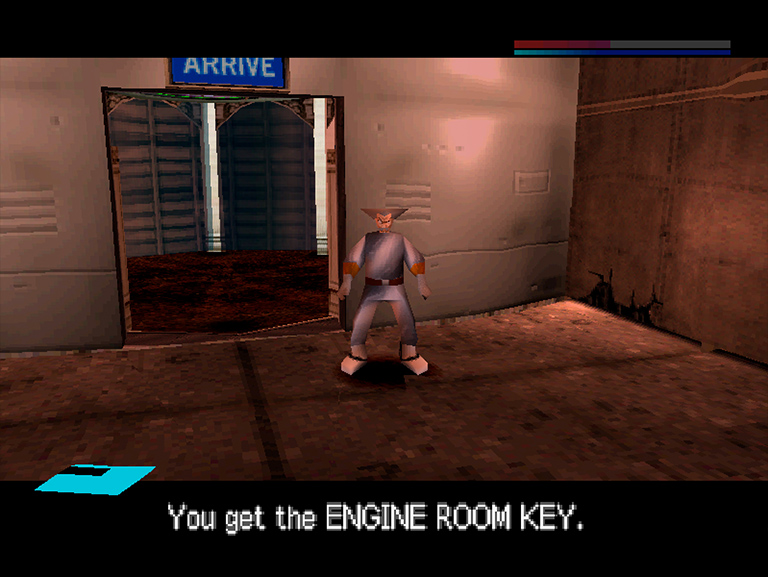
Item; Arriving at the Engine Room Level, pick up the ENGINE ROOM KEY CARD conveniently laying on the ground just outside the elevator.
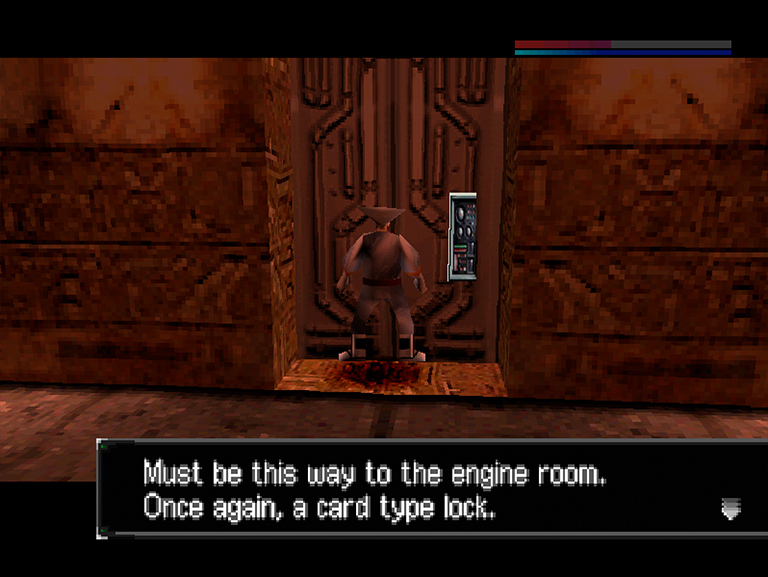
Door; Ensuring the GRAVITY CONTROLLER is turned on, carefully make your way to the opposite end of the room by jumping across the gaps in the floor. When you arrive at the door, use the ENGINE ROOM KEY CARD to gain entry.
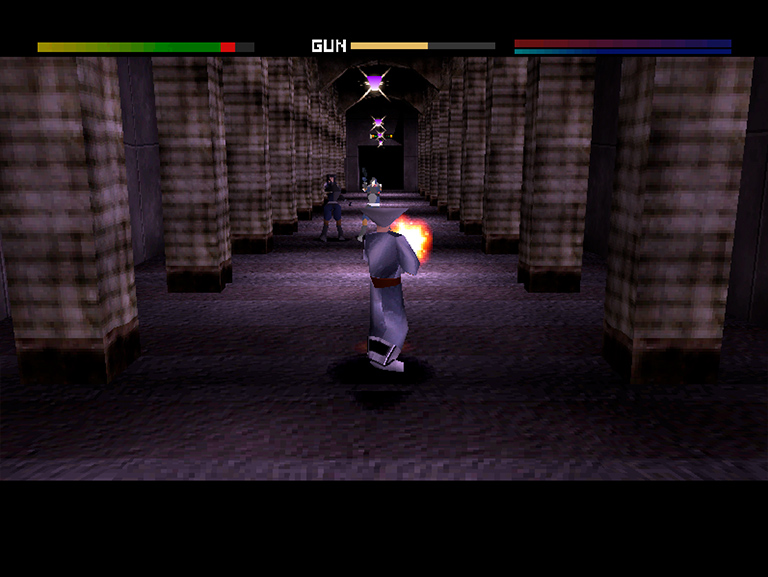
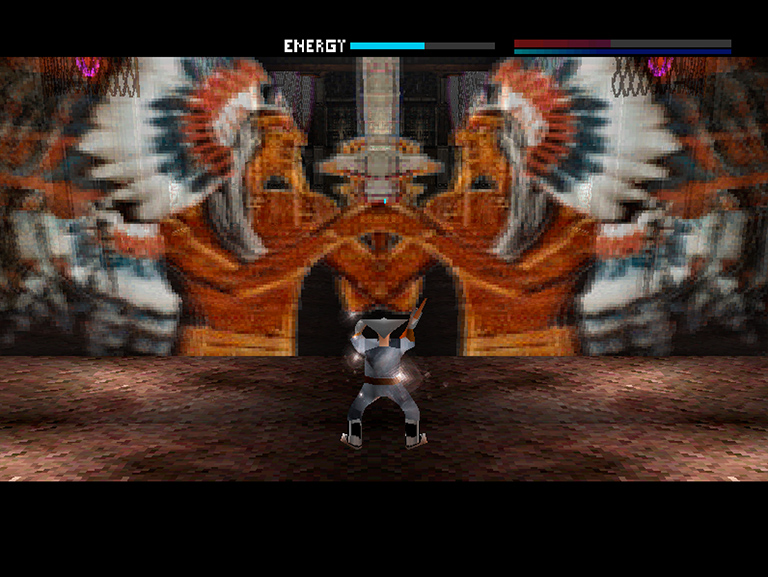
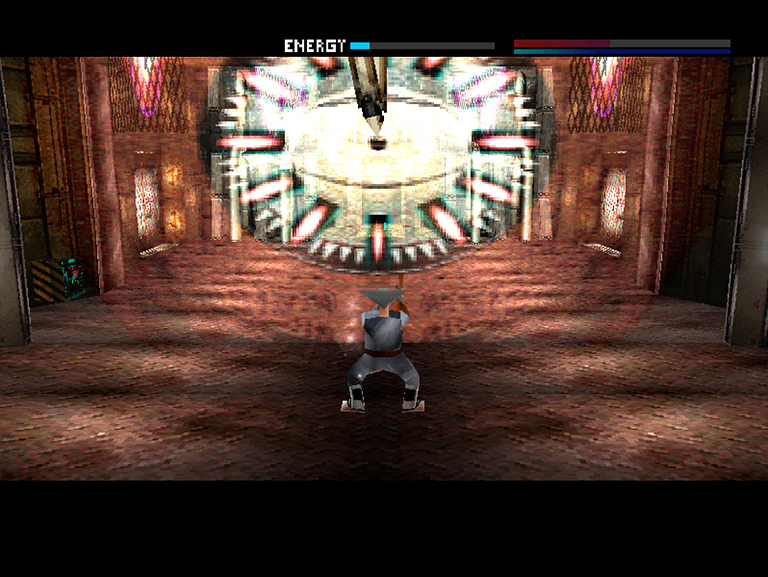
In the next room there are 3 holograms which act as barriers that prevent you from going any further. Equip the LASER GUN and follow the instructions below;
Tiger hologram; Simply jump up and shoot into the centre of the hologram to make it disappear.
Hieroglyphics holograph; Again, simply jump up and shoot into the sword in the centre of the hologram to make it disappear.
Clock hologram; To make the third hologram disappear, wait until both hands are pointing to 12 before jumping and shooting the centre of the clock. This requires good timing, so it may take more than one attempt.
Cut scene
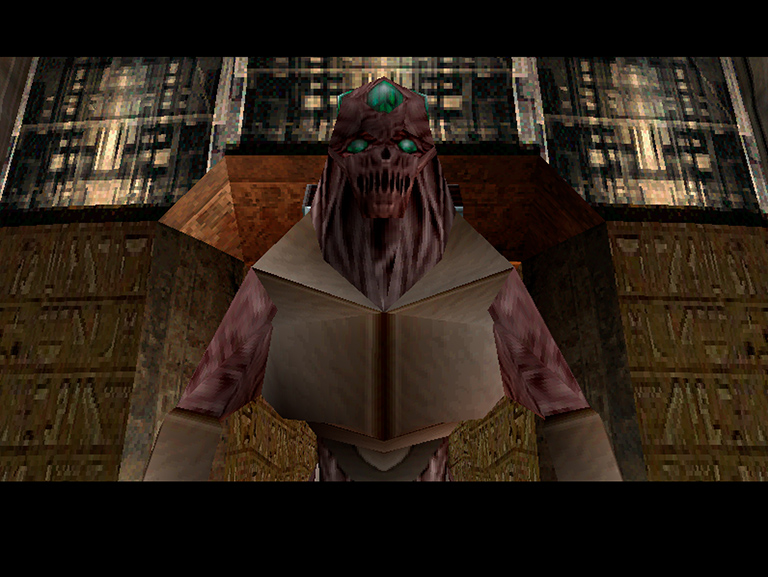
Tempest; Following the short cut scene you'll be introduced to one of Zeno's guards, Tempest.
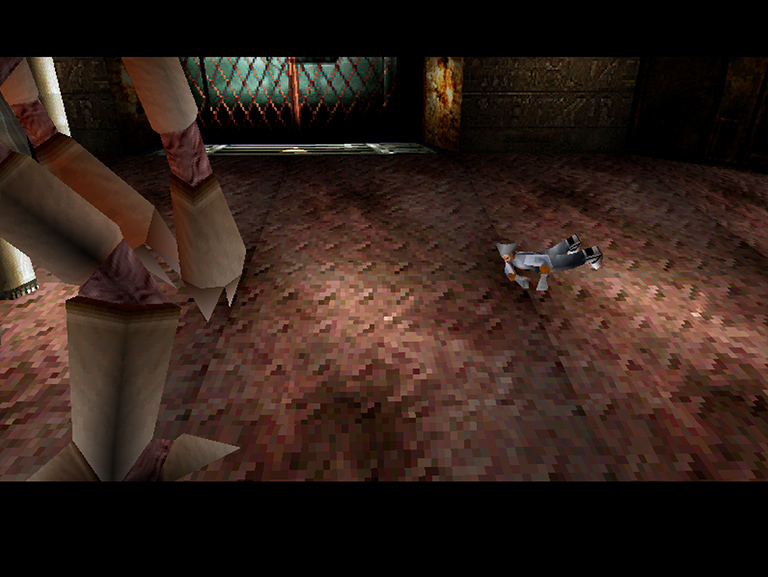
Don't waste your ammo; You cannot defeat Tempest, and instead must simply avoid a couple of his attacks to trigger another cut scene.
Cut scene
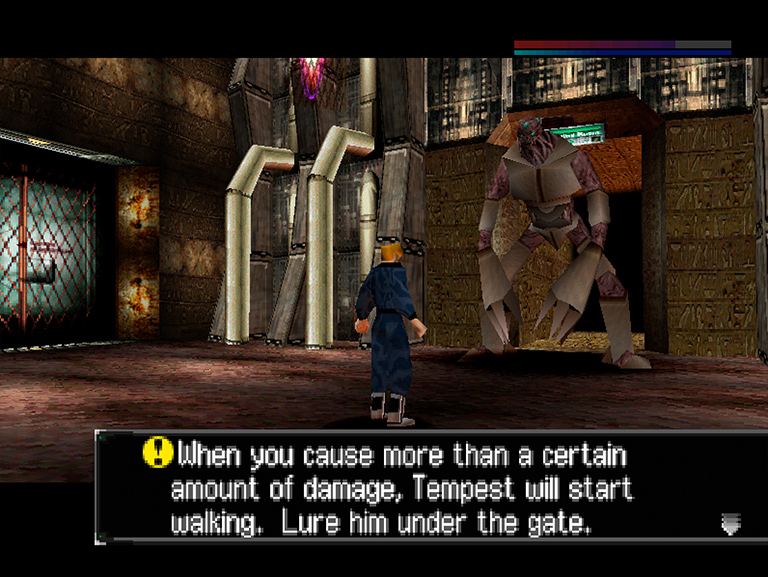
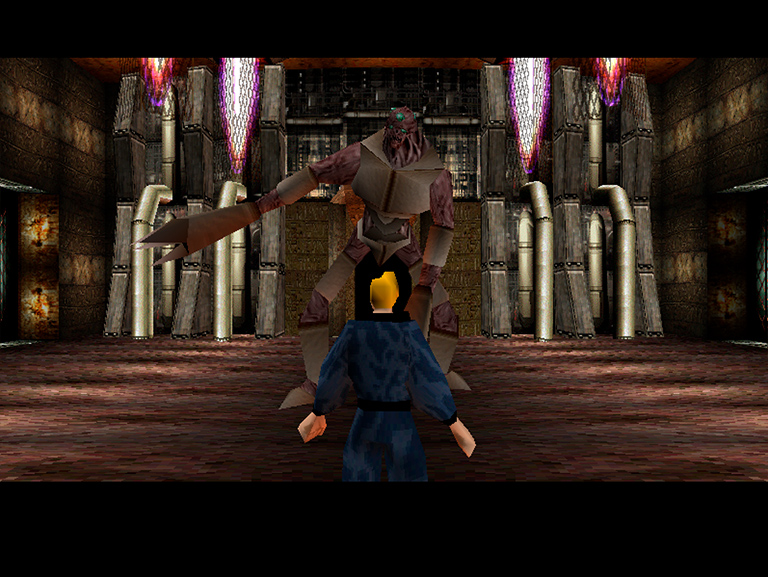
Following the cut scene you will regain control of Acarno and must lure Tempest under the large shutter door in order to crush him. Quickly equip the HAND BAZOOKA and distance yourself from Tempest before turning to shoot at him.
Avoiding Tempest's attacks; Between taking shots at Tempest you'll have to avoid both of his attacks. The first attack sees him smash the ground with both arms which prevents Acarno from moving for a couple of seconds if he isn't in the air. The second attack is a laser beam that Tempest shoots from his mouth - an animation will play showing Tempest "charge up" his attack before firing at you, giving you enough time to jump in the air and out of the way.
Keep shooting until Tempest moves; As you cause damage to Tempest (around 4 or 5 shots with the HAND BAZOOKA from close range should be enough) he will start to advance away from the door he is guarding. When he moves you are able to stop shooting him and simply avoid his attacks while luring him under the giant shutter door.
Job done; When Tempest has moved far enough a cut scene will trigger signalling victory.
Cut scene
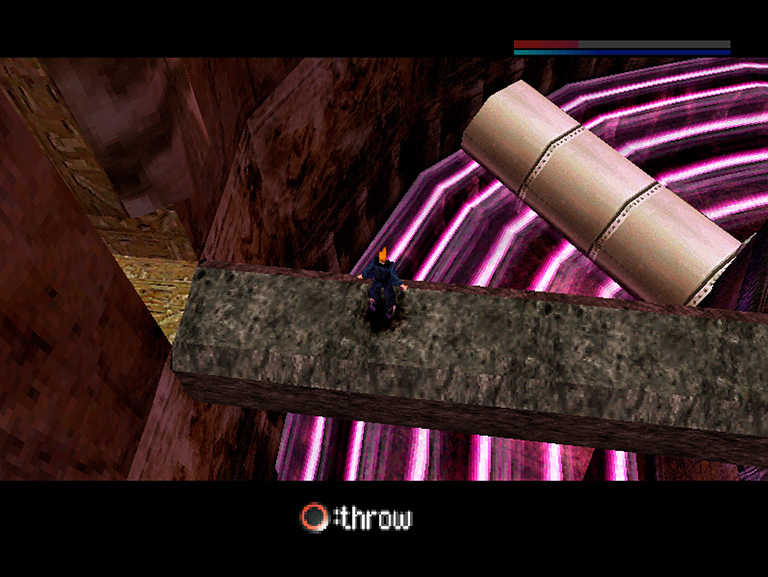
Following the cut scene you will take control of Acarno in the Engine Room. Before going any further, throw a FREEZE PACK off the side of the bridge on which you’re stood.
Aim; Throw the FREEZE PACK onto the pink rings below, allowing you to stand on them without taking any damage.
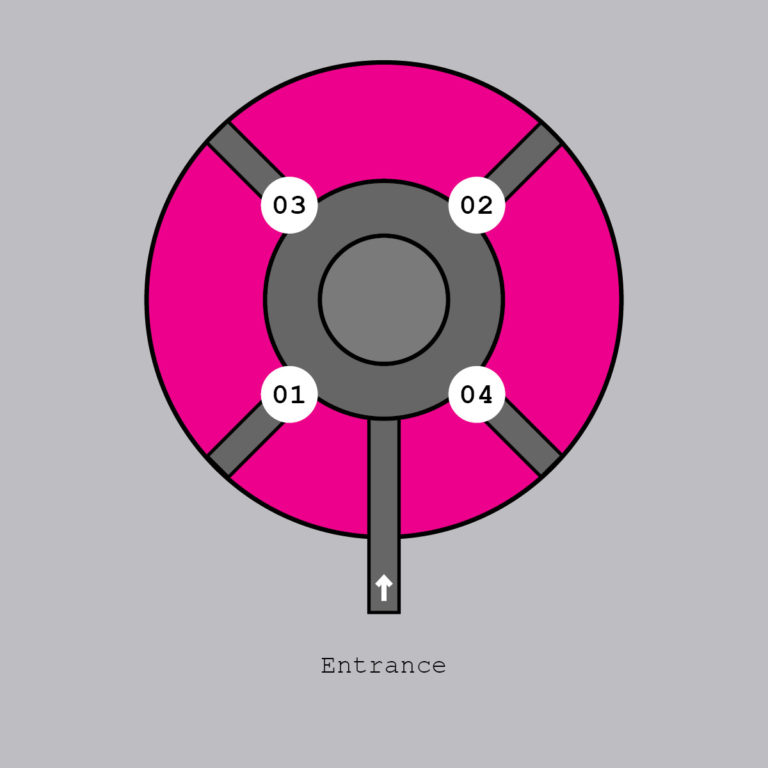
After freezing the floor, jump down and you will notice there are 4 pipes which stretch from the outer wall of the room to the central column. On top of each pipe is a switch – all of which must be activated in a specific order, as shown on the map below;
Switches; Hit them in the order shown.
Push the button; Here is what you're looking for.
Success; You will see the lasers on the central column turn off when you are done.
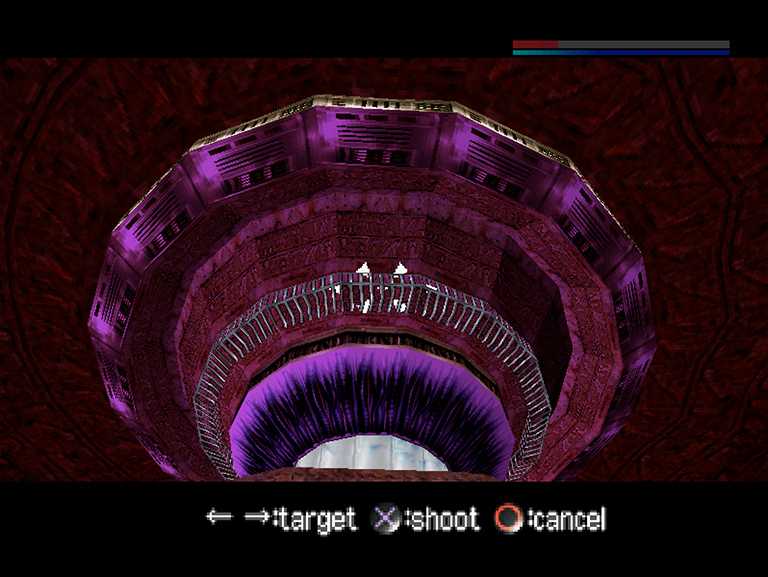
Head up; Either by jumping or using the HOOKSHOT, make your way up to the central platform.
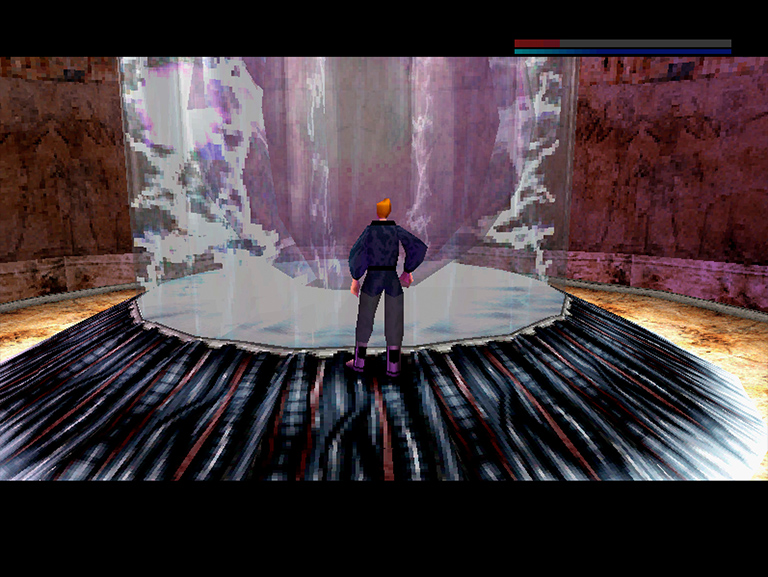
Power source; Use an EMERGENCY SPRAY in anticipation for the next part of the game before approaching the egg-shaped power source on the central platform and use the PLASMA BOMB.