[Episode 7] Shangri-la Elevator

At The Ministry of National Defence, the Head of Security learns of the ship's launch. No attack is made on the ship as all Earth's power is drained, meaning that all defence missiles are disabled. This leaves Earth's fate solely in the hands of Acarno - who has now successfully boarded Shangri-la and navigated it's docking bay, despite being separated from his comrades.

[Episode 7] Shangri-la Elevator

Summary

At The Ministry of National Defence, the Head of Security learns of the ship’s launch. No attack is made on the ship as all Earth’s power is drained, meaning that all defence missiles are disabled. This leaves Earth’s fate solely in the hands of Acarno – who has now successfully boarded Shangri-la and navigated it’s docking bay, despite being separated from his comrades.

To advance any further you must complete one of the game’s most difficult sections by exploring Shangri-la in order to gain access it’s main central elevator so that Acarno can complete his mission. 

You’ll need to collect several “Diva Pieces” in the process.

Video

You will emerge in a room which has three bridges joined by a central platform, around which are multiple floating crystals. Be careful as these crystals fire harmful lasers that kill you instantly. The lasers can be avoided if you move quickly. Dropping a DECOY on the ground will give you more time to move freely about this area, however these are best saved until the end of this section of the walkthrough.

Head forwards (avoiding the lasers), and in front of you is a silver, rock-like structure;

Elevator; Although you don't have to do anything with this right now, keep in mind it's location.
Bridge; Facing the elevator, head across the bridge on the left and through the doorway.

You’ll now be in a familiar looking hallway with columns running down either side, only this time with grey lighting. Equip either the BIG MAGNUM or ANTIQUE GUN and take our two more guards which appear on your left and right before heading through the double doors at the end of the hallway – note that the random item rule seems to apply again here, as sometimes the guards will drop MAGNUM SHELL and / or MACHINE GUN GARDTRIDGE, whereas other times you get nothing.

Emerging in a dark room, follow the instructions below;

1; Turn left and head towards the green light. Head up the stairs on the left of the green light.
2; At the top of the stairs, jump onto the square overhead pipe.
3; Walk along the pipe until you are level with the top of the round tank on your right - you will notice an item. On top of the tank you will find 1500 CREDITS.
4; Facing the back wall of the room you will notice another item on the tank below - jump across.
5; On top of the tank, pick up the first DIVA PIECE.
6. Jump up to the square pipe on the opposite side of the room of the one you were on and pick up the 2 BAZOOKA ROUNDS. Head back down to the ground and leave this room.
Before you leave; Although it is not compulsory, you are able to interact with the control panel in front of the door to this room. This will result in the tanks in the room lighting up one by one, with various creatures that offer messages when interacted with - these are clues as to how to complete Episode 7.

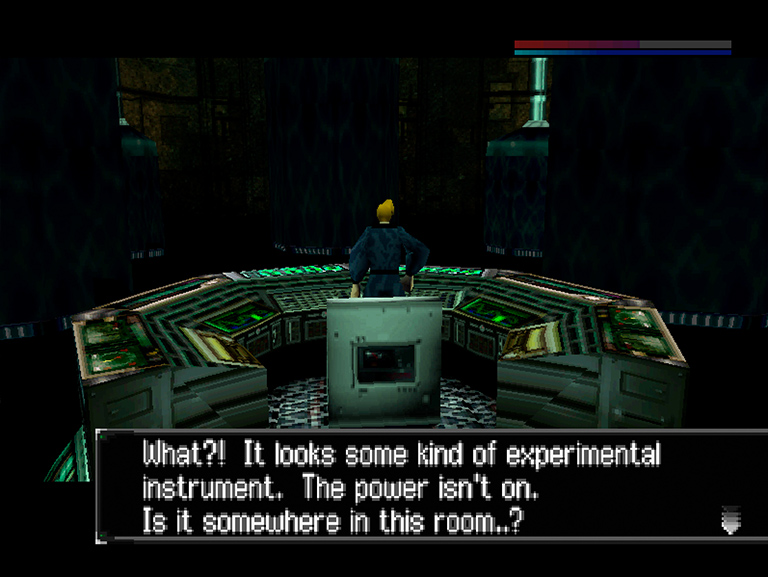
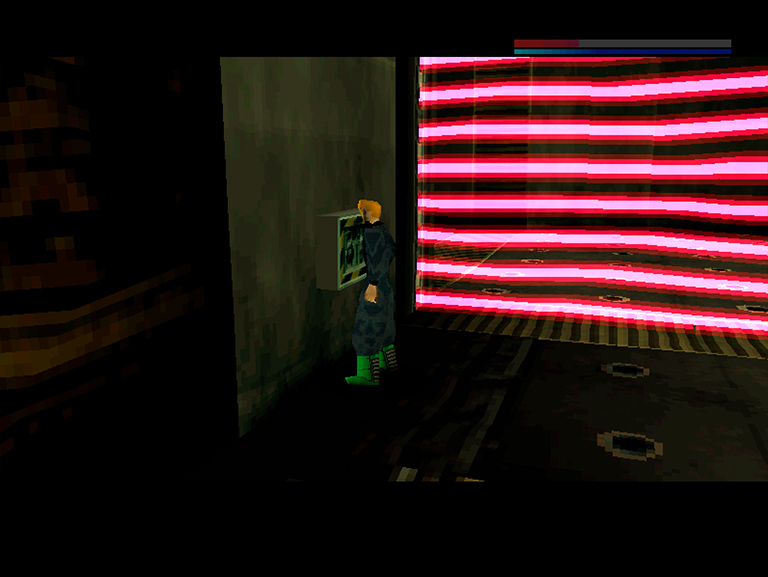
The control panel on the platform above must be activated before this can be done - simply head back up the stairs if you want to try this for yourself.

Equip the BIG MAGNUM or ANTIQUE GUN and head through the door. Two more guards will appear – deal with them or run past and head through the doorway, back into the room with the floating crystals.

Bridge; Head towards the elevator and take the bridge on the left. Advance through the doorway.
Item; Take out two more guards in another familiar looking corridor and pick up the MACHINE GUN CARTRIDGE left behind before heading through the door in front of you. Once again, this item may not appear or may appear as a MAGNUM SHELL.
Robot; In the next area there is a robot immediately in front of you - dispatch him your weapon.
Item; Pick up the ENERGY PACK left behind by the robot.

Before you progress through the next area it is worth pointing out that due to the long, winding corridors and multiple crossroads ahead, it’s easy to get lost. Using the below map, collect the three items before making your way to the switch;

Shangri-la Corridors Map Key;

Doors:

  • A. Entrance
  • B. Door with yellow triangle
  • C. Door with yellow triangle
  • D. Switch & pink laser gate
  • E. Door to Cryo Room
  • F. Door to Garden Room

Items

  • 01. OIL CARTRIDGE
  • 02. OIL CARTRIDGE
  • 03. 750 CREDITS

Enemies

  • X. Robot (re-spawns)
  • Y. Robot (does not re-spawn)
Doors; Note that there are a few doors in this section with yellow triangles in the middle - these need to be taken out with explosives.
Glitch; Note that there is a strange glitch which occurs at the door 01 on the above map - when shooting at the door (before blowing it up), an enemy health bar appears in the top left of the screen. Continuing to shoot will result in hearing an explosion on the other side similar to the one heard when taking out the robot moments ago. This is odd as there are no enemies in this entire area with the exception of the two robots near the start.
Switch; After collecting all the items in this area and taking out both robots, make your way to the switch and use it to open the pink laser gate.
Door "F" on our map; Head left into the newly opened area and through the door ahead.
Trim the bush; You will now be in the Garden Room. Equip the FLAME THROWER and take out the bush immediately ahead of you.
Locate the big tree; Head over the bridge and on the left is a tall tree coming out of the ground, with some some shorter trees behind up again the wall of the room - jump onto these.
Jump across; Ensure you have the SHOCK ABSORBER BOOTS equipped. Facing the tall tree, jump across to it.
Item; Pick up the next DIVA PIECE.
Locate the waterfall; Head back to ground level and you will be able to spot a waterfall. Place a bomb again the rock behind the waterfall to reveal a hidden alcove.
Item; Pick up another DIVA PIECE in the alcove before heading back across the bridge and exiting the room the way you came in.
Door "E" on our map; Back in the corridor, head forwards and take a right when you hit the wall. Enter the door.
Cryo room; There are 4 numbered cryogenic chamber beds in this room. Locate bed "01", jump on top and place an explosive.

Back in the corridor, head back to the start (use the above map if you’re struggling to find your way).  Equip the ANTIQUE GUN on the way as there will be another robot waiting for you – take him out before heading through the doors you first entered the corridors through. Keep your weapon drawn as there are two more guards to take out.

Now that all 4 DIVA PIECES on this level of Shangri-la have been collected, the doors to the central elevator (in the centre of the platform in the next room) must be opened.

Before heading back into the room with the floating crystals, equip the HAND BAZOOKA and ensure it’s fully loaded. It’s also worth saving here as it’s easy to die during the next part of the game.

Crystals; As you can see on the above screenshot, there are 3 types of crystals - orange, pearl and silver. There are 6 of each type in total. In order to open the elevator doors you must destroy all 6 of any colour while avoiding the red lasers that will fire at you continuously - ensure you jump around as much as possible and avoid running in straight lines as the lasers will take you out in one direct hit. If you have any DECOYS left, now would be a good time to use them.

Another good tip is that you are able to reload the HAND BAZOOKA and use any health items in total safety by using any of the 3 open doorways across the 3 bridges you have already used.
Open doors; The elevator doors will open and lasers will stop firing when you have taken out all 6 gems of the same type. Put away your weapon and head onto the elevator.

Cut scene